Ghidra-analyzeHeadless 사용하기
두비니
·2022. 6. 29. 00:49

0. 개요
GHIDRA는 미국 NSA(National Security Agency)에서 배포하는 리버싱 툴입니다. 무료 리버싱 툴 중에서는 IDA와 견줄 정도로 성능이 좋고 다양한 기능을 제공합니다. 오늘은 Ghidra 설치 및 CLI로 Ghidra를 사용하는 방법에 대해서 정리하도록 하겠습니다.
1. 설치 방법
Ghidra는 java 기반의 툴이라 java 설치가 필요합니다. 본 포스팅은 Ubuntu 20.04 환경에서 설치를 진행합니다.
sudo apt-get install openjdk-11-jdk

java --version을 했을 때 버전이 확인된다면 정상적으로 설치된 것입니다.
다음으로는 배포된 Ghidra를 설치하면 됩니다. 아래 사이트 기준 최신 릴리즈를 다운받으면 됩니다.
배포: https://github.com/NationalSecurityAgency/ghidra/releases
Releases · NationalSecurityAgency/ghidra
Ghidra is a software reverse engineering (SRE) framework - NationalSecurityAgency/ghidra
github.com
그 이후에는 그냥 unzip 후 bash script인 ghidraRun을 실행시키면 됩니다. 혹시나 실행이 되지 않을 경우 chmod +x ghidraRun을 통해 실행권한을 주면 됩니다.

2. Ghidra - analyzeHeadless
Ghidra는 기본적으로 GUI 기반의 프로그램입니다. 그렇다 보니 시간도 비교적 더 오래 걸리게 되고, 자동화를 하기에는 애매한 부분들이 있습니다. 그래서 Ghidra의 디컴파일러만 사용하는 Ghidra-CLI의 사용법을 정리하고자 합니다.
결론적으로 Ghidra에서는 analyzeHeadless라는 CLI script를 제공합니다. support 폴더 안에 있고, 이를 이용하면 GUI를 사용하지 않고도 디컴파일 결과를 얻을 수 있습니다.

기본적인 사용법은 다음과 같습니다.
./analyzeHeadless ghidra-project-directory -import binary-file -postscript yourscript- ghidra-project-directory : 프로젝트를 생성할 디렉토리
- binary-file : 디컴파일할 대상 바이너리 파일
- yourscript : 사용할 script (java와 python 사용 가능, 아래 설명)
analyzeHeadless 스크립트는 딱 프로젝트를 열고, 디컴파일 해주는 역할까지만 합니다. 그 이후로 디컴파일 된 코드들을 추출하는 등의 작업들은 스크립트를 통해 구현해아 합니다. 조사해본 결과 Ghidra API를 사용하면 되고, java와 python을 지원해주는 것 같습니다. API들은 여기서 확인할 수 있습니다: https://ghidra.re/ghidra_docs/api/index.html
Overview
ghidra.re
3. Ghidra-analyzeHeadless 사용하기 (example)
이제는 Ghidra의 analyzeHeadless script를 사용해서 바이너리를 디컴파일 해보도록 하겠습니다. ghidra 파일과 아예 다른 파일에 바이너리 파일을 넣어두었고, 다음과 같이 실행시켰습니다.
~/ghidra_10.1.4_PUBLIC/support/analyzeHeadless . tmp_ghidra_project -import ~/decompile_code/input/function_pointer -postscript decompile.py
사용한 python script (접은글)
from ghidra.app.decompiler import DecompInterface
from ghidra.util.task import ConsoleTaskMonitor
import sys, os

# get the current program
program = currentProgram
decompinterface = DecompInterface()
name = currentProgram.getName()
decompinterface.openProgram(program);
print('[*] Binary Name : '+str(name))

# get all functions recognized
functions = program.getFunctionManager().getFunctions(True)

for function in list(functions):
    print("[*] Function Found : "+str(function))
    # decompile each function
    tokengrp = decompinterface.decompileFunction(function, 0, ConsoleTaskMonitor())
    #print(tokengrp.getDecompiledFunction().getC())
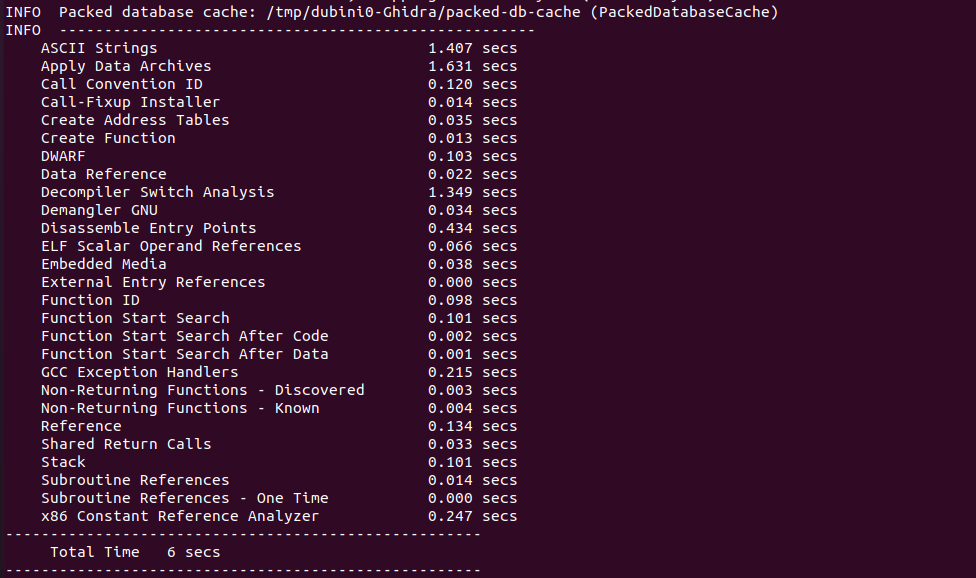
실행시키면 많은 로그들이 뜨는데, 먼저 보면 분석하는데 얼마나 시간이 걸렸는지 등등이 확인 가능합니다.
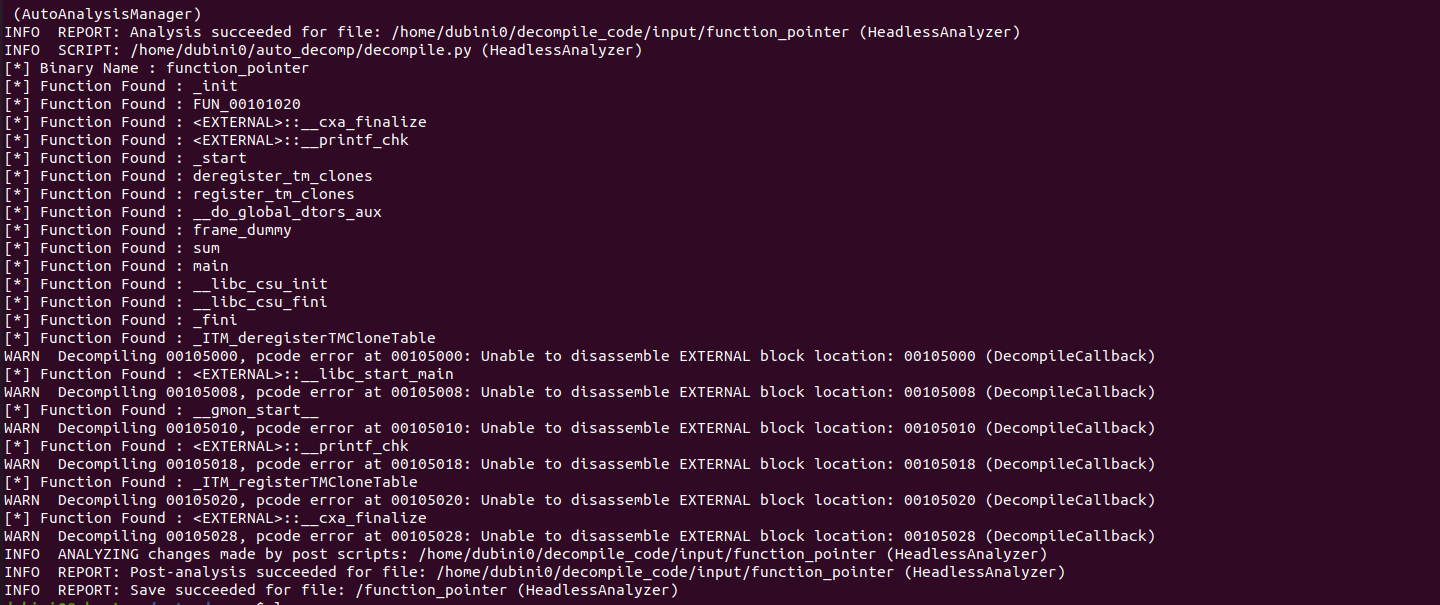
그리고 그 이후에는 decompile.py로 넘겨져서 모든 function들에 대해 가져오는 것을 알 수 있습니다.
마지막에 주석처리한 print문도 실행시키면 함수 내용을 확인할 수 있습니다.
4. Conclusion
막상 쓰려고 하니깐 잘 정리가 된 글이 없어 작성하였습니다. analyzeHeadless를 잘 사용한다면 자동화에도 적극적으로 이용할 수 있을 것 같습니다. 직접 해봤는데 API 문서도 있고 크게 어렵지는 않은 것 같네용ㅎㅎ 부족한 부분이 있다면 댓글 부탁드립니다. 감사합니다!
5. Reference
https://reverseengineering.stackexchange.com/questions/21207/use-ghidra-decompiler-with-command-line
https://static.grumpycoder.net/pixel/support/analyzeHeadlessREADME.html
https://static.grumpycoder.net/pixel/support/analyzeHeadlessREADME.html#examples
'etc > Tips' 카테고리의 다른 글
| C언어 Inline Assembler 가지고 놀기 (0) | 2023.04.19 |
|---|---|
| 컴퓨터로 논문 읽을 때 팁 (다크모드 전환) (4) | 2022.04.15 |
| Python 다운받기 (0) | 2020.12.31 |
| IDA 처음 쓰는 사람들에게 (3) | 2020.08.31 |
| Pwntools 처음 쓰는 사람들에게 (0) | 2020.08.09 |